Monday, December 29, 2014

Happy New Year

As the New Year approaches, I've been busy wrapping things up for 2014 (literally!) and making plans for 2015! I love the New Year and the new beginnings that it brings! One of my resolutions for the year is to consistently document our family adventures! The kids are growing way too fast to remember all the adorable things they do. For example, Sophie likes to say, "Looks like..." As in, "Looks like you want a bite." or even more adorable, "Looks like me want a bite." Seriously, she could not get any cuter! And I'm gonna have it written down to prove it!

As far as goals go, if they aren't written down and you don't have it scheduled on the calendar, it's NOT going to happen! So, every Sunday morning before church (we attend the 1:00 next year), I'm going to document our week. (I much prefer the word "document" to "scrapbook". Details, details.) Then, I'll post the finished product here on the blog on Monday! Lucky you. ;) I'm also starting up an MDS club to teach you how to use the software, so if you are interested in getting monthly tips, tricks, tutorials and projects, contact me!

So, without further ado, here are our Christmas 2014 pages! The "Before" is using JUST the Project Life App, and the "After" is jazzing it up a little using Stampin' Up!'s My Digital Studio (MDS). Just by adding a few finishing touches.
BEFORE
BEFORE
AFTER 
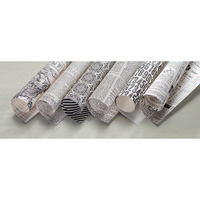
This page was a little tricky, so I didn't add much. That white card in the middle immediately draws your attention, but I did want to add more of a title without adding any more "busy-ness". I also wanted to balance out that dark red with a fun Christmas tree border, which is from the Frosty Days II designer series paper.

The next page was lightened up quite a bit with the blue background paper. (Also Frosty Days II) The gorgeous photos speak for themselves, but it also needed a beautiful title. I love being able to add text anywhere on the page, in any font I want! I also added just a few photo highlighting circles to show that they were INDEED swimming outside on December 23rd!!!

AFTER

BEFORE
BEFORE


AFTER
 I love, love, LOVE the woodcut snowflakes on this page!!! I love how it ties in with the wood nativity set. (The first in my collection!) Their lightness enhances and softens the page, and guides your eye around the entire page.

The following might be my favorite of the four! I added stitching to separate the "before & after" photos of the Christmas room. The Before & After text was also added. (LOVE how MDS enhances the awesomeness of the Project Life App!) I love the background paper border, and I LOVE LOVE LOVE the "visions of sugarplums" quote I added to their sleeping picture. Those little stars are just a stamp and add the finishing touch to this adorable picture! I'm thinking I need to frame that little corner of adorableness.I repeated the stitching as well as the stars at the bottom to add a little balance to the page.
AFTER
What do you think? Which page is your favorite? Is MDS something you want to learn how to use a little better? It's super user-friendly and really enhances the Project Life App! You can download a Free Trial below, or purchase the program in either digital format or as a disc.

Wednesday, November 19, 2014

I'm a guest blogger!

The Project Life App really is a great on-the-go tool for those of us with iPhones or iPads, but there are a few limitations as well. I'm not going to get into that, because this post is more about what My Digital Studio CAN do. Another bonus: you don't have to have an iPhone or iPad to use MDS, it's available to everyone!
To use MDS in the same way you would use the Project Life App, you will want to download the Simply Life Photo Templates (item #135245 $7.95US). You CAN make your own templates, but seriously? This is about making life EASIER. Just buy the download. ;) You will also want to buy at LEAST one of the awesome Project Life Digital Card Kits. (My personal favorite is the Love Story Collection. Item #138042 $19.95US) You can recolor these cards and they work GREAT for a family album! Here's another tip: search "pocket cards" in the online store and you'll find Stampin' Up! has a few more card kits that were released before the Project Life by Stampin' Up! announcement.  
Here's the cover of my 2014 family book. (I know, you just saw that picture in my bio. It's my official 2014 family photo. You might even see it in my annual Christmas card!)
Family Book 2014-002

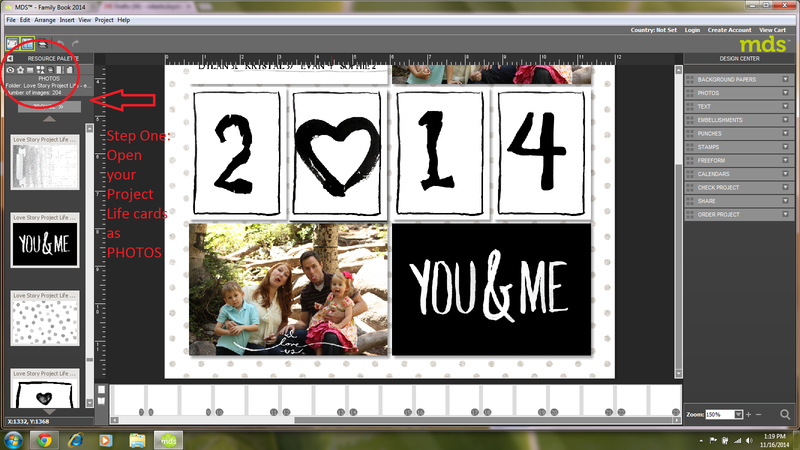
Here's how it works: When you download your Card Kits, choose the "Other Applications" option. This will allow you to use your cards as photos, which enables the "drag & drop". No need to spend time resizing or moving cards! You will need to use the 12x12 album size in order to use the Simply Life Photo Templates. You will want to choose the "Photo Only" option when beginning your project, scroll down to the "Simply Life" template and then arrange the pages how you want. (If you don't know which templates you want to use where, don't worry. You can rearrange them once you've already opened the project.) You can also insert individual template pages as you go. Just go to "Insert" on the top left of your screen, "Add Other Template Pages" then you will choose 12x12 under "Photo Only" like on the screen below.
Simply Life Template
Choose "Simply Life Photo Layouts" and then select the layout you want.
I have been creating a "traditional" Project Life album with this years photos, so I already know which templates I want to use for each page. I LOVE having the album out so my family can enjoy it even when it's not finished yet, but I DO want to create a digital version so I can make a copy for each kid to have, and I just like knowing I can print another copy just like that! Anyway, we all have our reasons for scrapbooking the way we do.
Here are a couple screen shots to show how to use the cards in the photo templates:
Step One
Step Two
I hope that makes sense, and I hope you'll try it out! Let me know how you like it, and if you have any questions! What are your thoughts on Project Life and MDS? What is YOUR scrapbooking style?

Monday, November 3, 2014

Our Families Weekly Summary Oct. 26-Nov 1, 2014

I've just started getting a weekly update from my sister-in-law about her little family, and I thought it was a great idea! So I've decided to write down our life, one week at a time. I take a TON of pictures, but don't always remember some of the small details. I do try to write down the cute/funny things the kids say and do, but some of the seemingly insignificant details get lost, and those are the things that I'm sure we'll all like to remember in 20 years. So here goes my first weekly summary.

October 26 – November 1, 2014

The week started off with a pretty good day at church. The kids behaved themselves in Sacrament Meeting (although Sophie always announces she needs to go poop during one of the speakers… ) It’s a little difficult on her having me go up to play the organ, especially at the end. They are both getting better with it though. Evan likes to go to his Sunbeams class (as long as he can sit by JJ!) and I get to watch him from the back of the Primary room where I sit with my large class of 7 year olds. (I’m a team-teacher but don’t ever teach the lesson, I’m just there because there are ten 7 year olds. TEN.) Anyway, he raises his hand to answer the questions, and he loves singing time. He doesn’t sing much, but he dances in his chair. Loves it. Sophie only cried for a couple minutes when Dylan dropped her off at nursery. (Huge improvement. The ward changes made it pretty difficult on her, especially because Dylan had been her nursery leader the entire time she’s been in there!)

We came home and had a “HULK SMASH” Family Home Evening lesson. We talked about how feeling angry is ok, it’s how we handle the anger that matters. We had a list of ways to respond to anger and the kids gave a thumbs up or thumbs down. Evan gave some great suggestions on what to do when you’re angry. My favorite was “just laugh!” He has been reminding Sophie all week when she screams “that’s a thumbs down for you!” I keep the Hulk picture up on the pantry door to remind them during the week what we talked about. I’m thinking of making a FHE board with a bulletin board for the weekly reminder. I’ll have to go sketch that project out.

Pumpkin art by Evan

Speaking of projects, I painted that $15 Craigslist nightstand silver. I’m very pleasantly surprised with it! Spray painting hasn’t worked so well for me in the past. It was a win this time. I’ll share a picture when the new handle I ordered arrives. I also spray painted and recovered one of our dining chairs. I LOVE how it turned out! I’m hoping to finish the other 5 next week. I used the Rustoleum Metallic Spray Paint. It worked great for me!


I’ve also been keeping busy teaching piano lessons, and we had our Halloween piano recital this Saturday night! It went really well! I’m proud of all my students for all their practice and their efforts in learning their pieces!

Let me back up a little to actual Halloween though. The kids requested donuts for breakfast. Why not? It’s a holiday, and they’re going to be overloaded on sugar for the next few days anyway! Evan loves the chocolate covered kind with sprinkles. He chose a lemon filled one today… although it really doesn’t matter what’s inside since he just eats the top off of it. Sophie does the same thing. She always chooses the chocolate covered star shaped kind with sprinkles. I prefer the chocolate covered cream filled kind myself. (I believe they are called Bismarcks.) J While they bounced off the walls, I designed our annual Christmas card. I’ll have to do the annual letter next week.

Anyway, I had taught our weekly music class on Wednesday (a group of us get together and take turns teaching a little class at the church. We sing a few songs and make a little craft, and once a month take a fun fieldtrip.) I had some foam pumpkin stickers and spider rings left over from that so the kids had fun with those. We had pizza and “frog eye salad” for dinner (thanks to my friend Nikki who I ran into at the grocery store who was planning the same thing). Evan was a little fascinated by the frog eyes, but kept saying “they’re not real Daddy.” Haha. After dinner Evan put on his Spiderman hoody and was ready to go! Sophie had been wearing her witch t-shirt and purple spiderweb tutu all day anyway, so we added her cute little fascinator. Easiest (laziest?) costumes ever. My same friend Nikki knocked on our door and so we all went trick-or-treating together! Evan had a blast getting candy, but he was even more excited to play with all the other kids who were out. Sophie got scared by a lady who opened the door and was dressed like a witch or the grim reaper or something. She’s not as big of a fan of Halloween as her brother is. She did enjoy all the candy though!


The next day we spent most of the morning waiting at Walgreens to do these biometric screenings to get a discount on insurance. It took kind-of a ridiculously long time, but it will save us $50 a month, so whatever. Finally, we were on our way to Dylan’s company picnic. We had lunch, cotton candy, and snow cones. There were funnel cakes, but the lines were always long. Evan loved the inflatable obstacle courses and slides, and Sophie LOVED the pony rides! There was also a camel, but again, the line was always long so we didn’t try it. (Same with the paddle boats, trampoline bungee jumping thing, and rock climbing wall.) Evan did get to see a “magic” show. The guy was honestly a little weird, and there wasn’t much magic, just some bad jokes, but Evan the entertainer enjoyed it. That’s all that matters.

We came home and I had my recital (and of course forgot to take pictures!!!) while Evan took a bath…the entire time! (He was COVERED in sand from the picnic.) The kids did come out for rootbeer floats at the end though, and to play with all the other kids. I think it went pretty well!
Now on to the next week, I’m preparing for several card and Project Life classes and I do believe it’s time to decorate for Christmas! (If I don’t get started now, it will never happen!)

Tuesday, October 28, 2014

Project Life by Stampin' Up!

Do you know where your photos are?


The easiest way to get your photos out of your phone and into albums to look at and SHARE!

Project Life by Stampin' Up!


Wednesday, September 24, 2014

WOW.

Sometimes you find something so awesome, and amazing that you are left speechless and all you can say is "WOW".  The new Project Life app is one of those things! SERIOUSLY. It's worth the $2.99. It might even be worth buying an iPad. (Anyone have a used one that want to get rid of?)

So, anyone with young kids knows the guilt of watching their amazingly adorable lives pass you by while all you collect are stacks or memory cards full of photos that you swear you'll get to when they're older. (Am I right or am I right?) Well, newsflash: you're going to forget those small precious details like "what was he pretending to be in that photo?" or "why was she celebrating?" before you have time to document it all. THANK GOODNESS for Project Life for making it so much easier to document those photos and memories! And HALLELUJAH for the new app that makes it so easy that you seriously have NO EXCUSE!!! 

Here's the story:

Actually, I'm not going to type it out, because I already spent 5 minutes (at the MOST) making an album page with the Project Life App! BAM. Recorded. DONE. NO GUILT. If only it was that easy to get them dressed.


FYI: The center "white page" was done on the app and then I simply used Stampin' Up!s My Digital Studio to throw it on a page that I turned blue to match his shirt. SO SIMPLE.


Vacation calling...

Of course I brought something to do!
And treats to eat...
but who needs all that to have fun?

Wednesday, September 10, 2014

Halloween Treat Legs & All Season Thank yous!

Boring title, I know. NOT boring projects though. Maybe they used up all my creativity for the week. Or maybe my brain has given up knowing that vacation is 3 days away. Hallelujah! Or MAYBE it's because I stayed up until 11:30 hanging out with the girls (which sounds so early to my younger self)! It IS possible that the answer is D- all of the above.

So the Wreath Event has now taken place! (But don't worry, you CAN still buy the wreath kit!) The plan was to also make these cute witch leg treats, but we just had so much fun we ran out of time! So that will be my little gift to the attendees. 
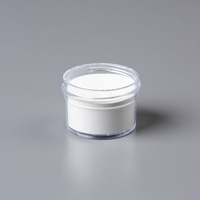
Product List
Heat Tool
$29.95
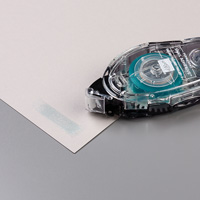
Sticky Strip
That AND a little thank you. I was totally taken by surprise when Nikki asked if my cards were for sale. What? MY cards? Sure you can buy them! So people actually use these things? They don't just collect them? Just kidding. I really do send an occasional card or two. It's just that I also MAKE an occasional card or fifty. haha.


Product List (and yes I did use retired ribbon dang it! I love that stuff!)

Product List
2013-2015 In Color Core'dinations
$11.95

Tuesday, September 2, 2014

Cartwheel Santa!

Yep, Christmas, Halloween, Christmas, Halloween. That's how we roll around here. Speaking of rolling... today I made the BEST. CARD. EVER.

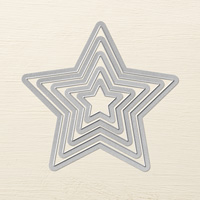
When I saw this cute Get Your Santa On stamp set (and that star border punch! Dying!) at convention, I knew I was buying that! So, I usually just CASE cards, (and for those of you who aren't in the card world, that means Copy and Share with Everyone-- although I say copy and steal everything!) but all the cards pretty much looked the same for this cute set. So, I thought Santa needed something FUN. I mean, it's SANTA. So I came up with this... (you HAVE to watch the video!)

I also want you to notice the words stamped behind Ol' St. Nick there. One of the cool things about the photopolymer stamps is that you can bend them and stick them on the acrylic blocks. So, I cut the words above Santa's head off and stretched them into a line, et voilà!


You can't even imagine how hard it was to get a video of Santa in action without his little helpers jumping in. This was the best take:

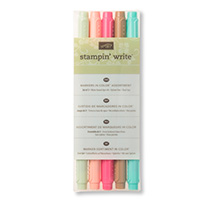
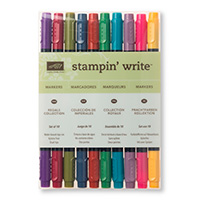
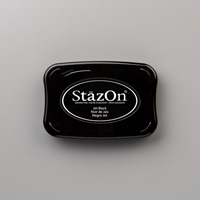
I could do a fancy tutorial for you, but all you have to do is search "spinner cards" and you'll find something. Let's just say, all you need are 2 pennies, 2 dimensionals sticking them together through the card, and then don't forget to pop the card up with 2 dimensionals in each corner, plus on the sides. (It makes it spin better that way.) Here are the other supplies I used (please note I didn't have the blendabilities, which would have looked even BETTER! So get those with the memento ink instead of just the regals markers and stazon, which are also fun. haha!) Also, when you sign up for Paper Pumpkin you get the D block! And if you do that before the 10th you get 50% off for TWO MONTHS! (Check out the previous post for more info, or just click on the top right corner of the blog!):

Product List